Installing a punching bag might seem straightforward, but securing it properly is crucial for your safety and effective training. A well-hung bag not only enhances your workout experience but also prevents accidents that could lead to injury. With the right installation techniques, you can enjoy a safe and effective training environment right at home. In this guide, we will walk you through the necessary steps and considerations for a secure punching bag installation, ensuring you can focus on your fitness and self-defense goals without worry. Whether you’re a beginner or an experienced fighter, understanding how to hang a punching bag correctly is essential for maximizing your training sessions. Let’s dive into the details to keep your practice both safe and productive.
Choosing the Right Punching Bag for Your Space
is crucial not only for enhancing your workout routine but also for ensuring safety and optimal training conditions. A well-chosen bag will complement your training style, available space, and personal goals, making it a worthwhile investment in your fitness journey.
When selecting a punching bag, consider the following factors:
- Type of Bag: Different bags serve specific training purposes. A heavy bag is ideal for strength and power workout, while a speed bag focuses on improving hand-eye coordination and speed. If you’re looking for versatility, a canvas or synthetic leather bag may suit you well.
- Weight: The bag’s weight should correspond to your own weight and training intensity. A general rule is that your punching bag should weigh about half your body weight. This ensures that it absorbs your punches without swinging excessively.
- Size and Space: Measure the area where you plan to install the punching bag. Ensure the height and width allow for free swinging and room to maneuver without obstruction. A minimum ceiling height of 8-10 feet is recommended to avoid any accidents when hitting the bag.
- Material: The bag material can affect durability and feel. Leather bags are robust but more expensive, while synthetic alternatives might be more budget-friendly yet less durable. Consider how much wear and tear you expect based on your training frequency.
In addition, think about storage solutions if space is limited. Wall-mounted bags or inflatable punching bags can be excellent alternatives that can be stored away when not in use, maximizing your workout space efficiently. Ultimately, choosing the right punching bag involves weighing functionality against your available space, ensuring a safe and effective training environment.
Essential Tools for Hanging Your Punching Bag
When preparing to hang your punching bag, having the right tools on hand is crucial to ensure a secure installation. Investing in quality equipment can not only enhance your training experience but also prevent accidents caused by inadequate mounting. Here’s a list of essential tools you’ll need to safely and effectively install your punching bag.
- Drill and Drill Bits: A reliable power drill is necessary for creating holes in your chosen mounting surface. Drill bits should be appropriate for the material-wood or concrete, for example. Make sure to get a set that includes various sizes to cater to your specific installation needs.
- Heavy-Duty Mounting Bracket: Choose a mounting bracket that can handle the weight and movement of your punching bag. Look for heavy-duty options made from steel, rated for at least 100-300 pounds, depending on the bag’s weight.
- Wall Anchors or Lag Bolts: If you’re installing your bag on a wall that isn’t a stud, you’ll need wall anchors for stability. Lag bolts provide a secure attachment when fastening the bracket to wooden beams or studs.
- Measuring Tape: Accurate measurements are vital for both the height and position of the bag. Using a measuring tape ensures that your punching bag hangs at the correct height for optimal usage.
- Level: A level will help ensure that your punching bag is hung straight. This helps prevent uneven wear on the bag and keeps it stable while you train.
- Screwdriver and Wrench: Depending on the type of mounting hardware you use, a screwdriver or wrench may be necessary to secure the bolts into place.
- Safety Gear: Don’t forget about safety-using gloves and safety glasses can protect you while you work, especially when drilling or handling heavy equipment.
Ensuring you have these tools ready and understanding their use will streamline your installation process, making it much safer and easier. A well-mounted punching bag not only enhances your workout but also minimizes the risk of injury during training.
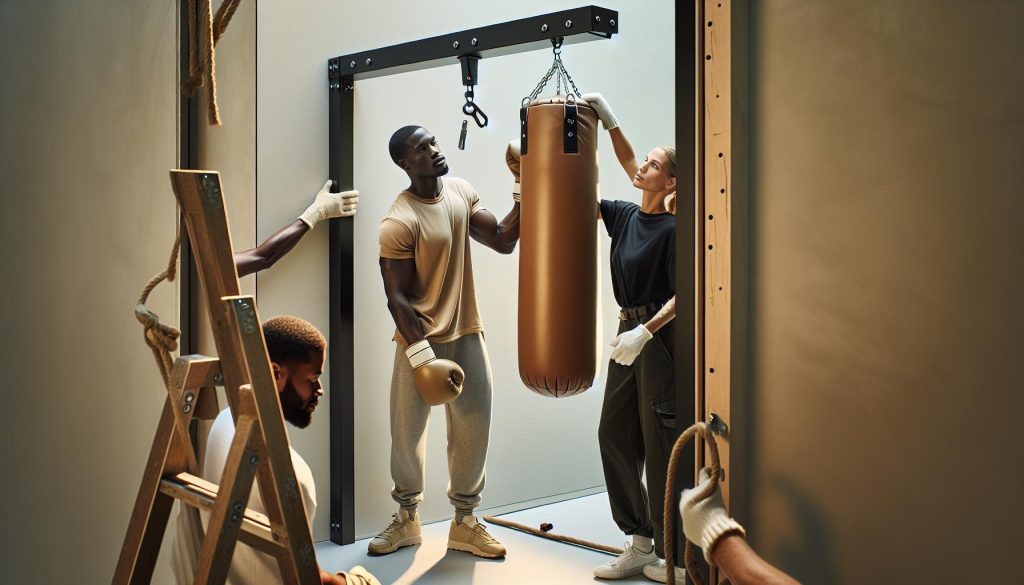
Step-by-Step Guide to Secure Installation
To ensure your punching bag is securely installed, a precise and methodical approach is essential. A stable setup not only enhances your training experience but also minimizes the risk of accidents and injuries. Follow these detailed steps to safely hang your punching bag in your space.
Start by determining the best location for your punching bag. Ideally, it should be in an open area with a minimum ceiling height of 8-10 feet to allow for full movement and strikes without obstruction. Once you’ve selected the spot, use a stud finder to locate the ceiling joists or wall studs, as these will be the most resilient points to support the weight of the bag.
Next, use a measuring tape to decide the height at which you want the bag to hang, typically around shoulder height or slightly higher for most users. Mark this spot on the wall or ceiling. It’s important to double-check your measurements to ensure that the bag will hang evenly. Use a level to mark the position where the mounting bracket will be installed, ensuring that it is straight.
After the position is determined, drill pilot holes at the marked spots, making sure they align with your stud location. Insert wall anchors if necessary, especially if you are mounting to drywall. Then, place the mounting bracket over the pilot holes and secure it in place using lag bolts or screws. Tighten them firmly with a wrench or screwdriver, as a loose bracket can lead to instability during training.
With the bracket securely installed, you can now attach the punching bag. Depending on the bag type, use the provided swivel hooks or chains to connect it to the mounting bracket. Ensure that all connections are tight and that the bag hangs freely without obstruction. Finally, give the bag a light push to test its stability, and adjust it as necessary to achieve your desired position.
Taking these steps will help ensure that your punching bag is securely installed, allowing you to focus on your training while minimizing the risk of accidents or equipment failure. Remember, a properly mounted punching bag not only elevates your workout experience but also extends the life of the bag itself.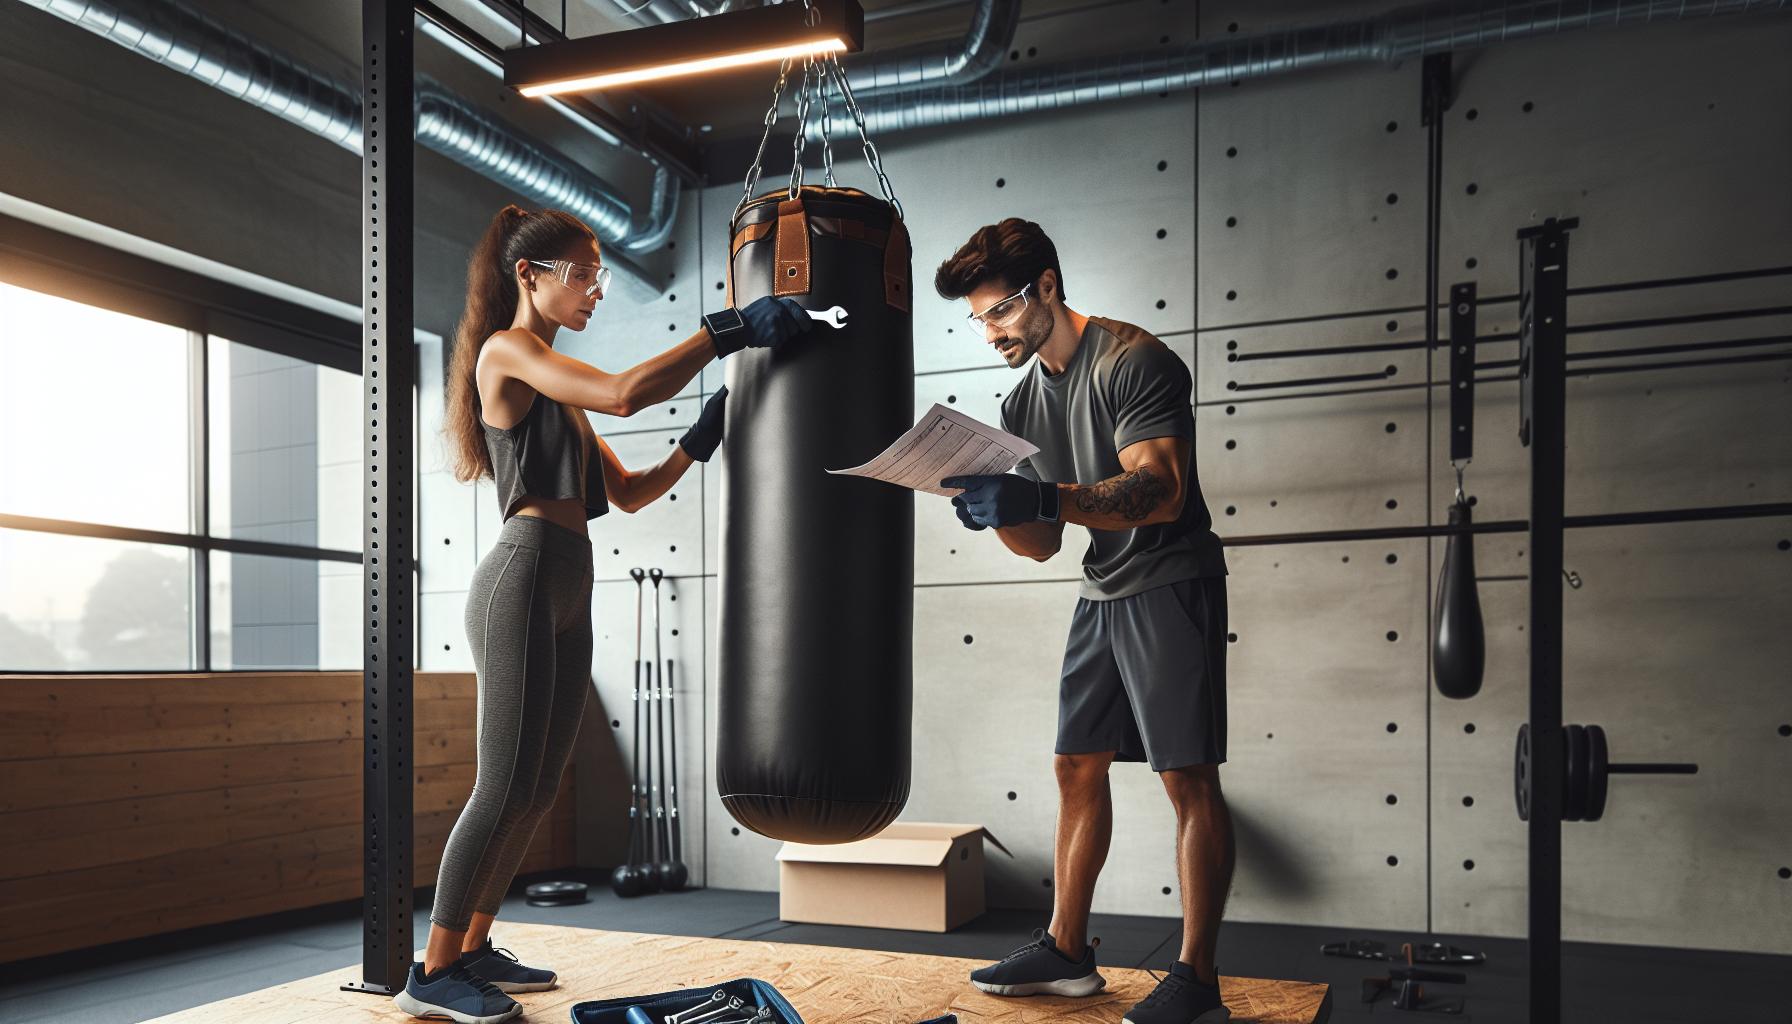
Safety Considerations When Hanging a Punching Bag
Before hanging a punching bag, consider the potential risks involved. An improperly secured bag can lead to accidents that may cause injury to you or damage to your surroundings. Ensuring a safe installation process begins with choosing the right location-ideal setups should feature ample overhead space as well as clear areas around the bag to prevent collisions with walls or furniture. A ceiling height of at least 8 to 10 feet is preferable to allow for full range of motion during workouts.
When installing, pay paramount attention to the mounting method. Use a stud finder to locate the strongest points in your ceiling to anchor the mounting hardware. Far too many accidents have occurred due to reliance on drywall alone, which may not withstand the weight and force of a swinging bag. Ensure that your mounting bracket is rated for the punching bag’s weight-too weak a bracket may lead to failure, resulting in potentially dangerous falls.
While the focus is on the punching bag, you must also consider your own safety. Wear protective gear when testing the bag after installation, especially during the initial swings, to mitigate any unexpected movements. If you’re unsure about the installation process, it may be prudent to consult a professional who can ensure Safe protocols are followed.
Finally, always inspect your setup periodically. Over time, wear and tear on mounting hardware can compromise safety. Make it a habit to check for loose screws, fraying chains, or any movement in the installation that could indicate instability. By properly addressing these safety considerations, you not only reinforce the integrity of your training system but also foster a secure environment conducive for practice.
Common Mistakes to Avoid During Installation
Installing a punching bag is a rewarding project, but it can also become a source of frustration and even danger if common pitfalls are not avoided. One of the most significant mistakes aspiring homeowners make is neglecting to find and use the proper ceiling joists for mounting. Many people mistakenly assume that any part of the ceiling will suffice to support the weight and movement of a heavy bag. However, the joists are typically the only parts capable of adequately bearing this load. Always utilize a stud finder to identify the strongest points where the bag’s weight can be safely distributed.
Another frequent error is using inadequate mounting hardware. Relying on cheap or improperly rated hooks or brackets can lead to catastrophic failure. Before you begin, ensure that any hardware you purchase is rated well above the combined weight of the punching bag, chains, and any additional accessories. This extra safety factor can prevent accidents, which are often preventable if precautions are taken during installation.
Additionally, many underestimate the need for adequate space around the bag. It’s crucial to allow for not just swinging movements but also the potential for the bag to move unpredictably during use. Not considering this can lead to collisions with walls, furniture, or even people. Make sure to have ample clearance on all sides of the bag to ensure a safe and effective workout environment.
Lastly, failing to periodically check the installation for wear and tear is an all-too-common mistake. Over time, screws can loosen, chains may fatigue, and mounting brackets can degrade. Establish a routine inspection schedule to ensure that everything remains secure, so that your workouts can continue safely. This attention to detail will not only enhance your training experience but also safeguard against potential injuries.
How to Maintain Your Punching Bag Setup
Maintaining your punching bag setup is crucial to ensuring safety and prolonging the life of your equipment. Regular upkeep not only enhances your workout experience but also prevents potential hazards during training sessions. A well-maintained punching bag can withstand rigorous use and remain stable during strikes, which is vital for both effectiveness and safety.
Start by establishing a routine for inspecting your installation. Check the mounting hardware frequently-look for signs of wear, rust, or loosening screws. It’s essential to ensure that the hooks, chains, and brackets are securely fastened and rated for the weight of the bag plus any additional forces exerted during use. Scheduling a monthly inspection can help catch issues before they become serious problems.
Cleaning your bag is another important aspect of maintenance. After each training session, take a moment to wipe down the exterior with a damp cloth to remove any sweat or residue that can lead to deterioration over time. For a deeper clean, use mild soap and water or disinfectant wipes to tackle stains and odors. Always allow the bag to dry completely to prevent mold or mildew from developing. This simple routine will not only keep your workout space hygienic but also enhance the longevity of your punching bag.
Consider using protective materials around your bag setup. Installing additional padding on surrounding surfaces can prevent damage in case of accidental collisions, helping to ensure a safe training environment. Furthermore, ensuring enough clearance around the bag aids in its free movement during practice, minimizing the risk of damage and injury.
By actively maintaining your punching bag setup, you create a safe and effective training environment that allows you to focus on improving your skills without distraction or concern for potential dangers. Regular inspections, thorough cleaning, and smart protective measures contribute significantly to your safety and the durability of your equipment.
Alternatives to Traditional Hanging Methods
When traditional hanging methods aren’t feasible or desirable, there are several innovative alternatives for securing your punching bag that can still provide an effective training experience. Exploring alternatives allows you to adapt to your specific training environment, whether it’s limited space or ceiling limitations, while ensuring safety and stability during your workouts.
One popular option is to use a freestanding punching bag. These bags are mounted on a sturdy base filled with water or sand, allowing you to place them anywhere without the need for installation. They can be moved easily, making them perfect for those who may need to adjust their training area. Freestanding bags often come with adjustable height settings, accommodating various users. While they might not swing with the same motion as a traditional hanging bag, they provide a solid striking surface and can help improve your accuracy and technique.
Another effective solution is mounting your punching bag on a wall bracket. Wall brackets are a great space-saving alternative and can securely hold the bag while allowing it to swing freely. They require less hardware than ceiling mounts and are particularly useful in spaces where you can control the wall structure. When installing a wall-mounted bracket, ensure you select the right type that can support the weight of your punching bag, as this is crucial for both safety and stability.
If a traditional setup still feels unmanageable, consider the doorframe hanger. This method involves a specialized suspension system that allows you to hang the bag over a door frame. It’s a portable solution that sets up in minutes and doesn’t require permanent installations, making it suitable for apartments or temporary training spaces. However, be mindful of the door’s sturdiness and check that the bag doesn’t obstruct normal use of the door.
Finally, for those with limited options, home DIY solutions can provide an effective means of suspending a punching bag. You can use sturdy materials and build a supportive frame if you’re handy with tools. Just be sure to follow safety guidelines to ensure that your creation can withstand the forces of your training without risk of collapse.
In summary, alternatives to hanging methods can vary widely in terms of practicality and installation requirements. By assessing your space and training needs, you can choose the solution that best fosters a safe and effective workout environment.
Troubleshooting Issues with Punching Bag Stability
Ensuring that your punching bag remains stable during use is crucial for both safety and effective training. A wobbly or improperly hung bag can lead to frustration and increase the risk of injury. One of the first steps to troubleshoot stability issues is to double-check the installation method and materials used. If your punching bag is hung from a ceiling hook, ensure that the hook is securely fastened into a ceiling joist or beam. Using a stud finder can help identify strong points in the ceiling where you should hang your bag for maximum support.
Another common issue involves the bag swinging too much. To mitigate excessive movement, consider using a stabilizing strap or chain. These accessories can limit the bag’s range of motion and help absorb some of the impact from your strikes, providing a more controlled workout environment. Additionally, check that the bag isn’t overloaded beyond its designed weight limit, as this can affect its behavior and stability.
It’s also worth assessing the surrounding space. If your punching bag frequently hits other objects or walls while in use, create a clear and unobstructed area for training. Not only does this improve your training experience, but it also helps maintain the integrity of your punching bag and the mounting system. Ensure that the flooring is even; an unstable surface can also influence the bag’s stability.
Lastly, be mindful of the wear and tear on your rigging components. Over time, chains, carabiners, and hooks can degrade, leading to potential failure. Periodically inspect these supporting items and replace them if they show signs of wear. This diligence will enhance safety and prolong the life of both your bag and the installation setup.
Adjusting Your Punching Bag for Optimal Use
Adjusting your punching bag properly is crucial for maximizing your training effectiveness and minimizing the risk of injury. The height, stability, and responsiveness of your bag significantly impact your workout experience, so understanding how to make these adjustments is essential for any serious practitioner.
To start, focus on the height adjustment. Ideally, the center of the punching bag should align with your punch zone, typically around shoulder height when standing. This allows for better striking mechanics and encourages proper technique. If you’re adjusting the bag for different users, a versatile setup might include adjustable hooks or a mounting system that can easily raise or lower the bag. For bags that become too high, use a step stool for adjustments, ensuring safety while making changes.
Next, consider the tension and swing of the bag. A tightly secured bag will absorb impact better and offer a more realistic punching experience, while a looser bag may swing excessively, hindering your technique and training flow. Utilize a stabilizing strap or chain to control the movement of the bag, providing more stability during rigorous workouts. If the bag swings too much, check how many hooks or transition points are being used; fewer points usually provide a sturdier option for consistent punching.
Additionally, weight distribution is key in adjusting your punching bag. Ensure that it is not overloaded beyond its designed weight, as excess weight can decrease the bag’s responsiveness and cause it to become unwieldy. Your punching bag’s material, whether filled with sand, water, or air, should also be considered-different materials will behave differently upon impact. Regularly inspect the bag to assure the filling is properly settled and has not compacted, which can affect performance.
Lastly, make your training area flexible. Setting up your bag in a space where it can be easily repositioned will allow for adjustments based on your training style or available space. Whether it’s moving from a centralized position to against a wall, ensuring there’s ample space to work around your bag can enhance your workouts significantly. Always remember that creating a conducive training environment will empower you to focus on technique and safety, ultimately improving your skills over time.
Tips for Long-Term Durability of Your Setup
To ensure that your punching bag setup stands the test of time, investing in a few key maintenance practices will keep it durable and functional for years to come. Regular attention to the installation and the bag itself can significantly enhance the longevity and performance of your training equipment.
Start by routinely checking the hardware used for hanging your punching bag. Over time, bolts, screws, and anchors can loosen due to the constant movement and impact that comes with intense training. Inspect these components monthly to ensure they are secure and show no signs of wear or damage. Consider using high-grade, rust-resistant materials specifically designed for heavy-duty applications, as this reduces the chances of deterioration.
Climate and environmental factors also play a crucial role in the longevity of your punching bag. If your training area is prone to humidity or extreme temperatures, consider investing in a protective cover for your bag when it’s not in use. Additionally, avoid direct sunlight exposure for extended periods, which can fade colors and weaken the material over time. Indoor spaces that maintain a stable, moderate temperature are optimal for preserving the integrity of your setup.
Another essential practice is implementing proper cleaning and maintenance routines. Wiping down your bag after each use not only removes sweat and grime but also helps prevent mold and mildew. A simple mixture of mild detergent and water applied with a soft cloth can do wonders. You can also opt for disinfectant wipes, which are excellent for eliminating bacteria, following the manufacturer’s guidelines to avoid damaging the bag material.
Finally, varying your workout routine can also contribute to the durability of your punching bag setup. Regularly switching up your training exercises can minimize excessive wear on specific areas of the bag, balancing out the impact and extending its lifespan. Remember to also store the bag in a manner that doesn’t allow it to swing unnecessarily when not in use. Proper care and deliberate training habits will ensure that your punching bag continues to provide a reliable platform for your workouts, enhancing your overall training experience.
Enhancing Your Workout Space with a Punching Bag
Creating an invigorating workout space can greatly enhance your training experience, and a well-placed punching bag is an excellent addition that brings both functionality and aesthetic appeal. Not only does it serve as a powerful tool for stress relief and physical conditioning, but it also creates a dedicated area that emphasizes your commitment to fitness and self-defense training.
To effectively integrate a punching bag into your space, consider the overall layout and accessibility. Aim for a location that allows for fluid movement around the bag-ideally, allocating a minimum of 6×6 feet of floor space with an additional 2-foot buffer from walls. This arrangement not only facilitates unrestricted motion during workouts but also ensures safety by reducing the risk of accidental collisions. Lighting is another important factor; bright, even lighting can help energize your space, making it feel inviting and stimulating.
Incorporating Accessories for a Complete Environment
Enhancing your workout space goes beyond just hanging up a punching bag. Adding accessories such as resistance bands, mats, or even a sound system can elevate your training regime. Think about implementing a wall mirror to monitor your form, which is crucial for improving your technique and building confidence. If you’re serious about your training, consider installing a punching bag with a 360° swivel mount to maximize mobility and allow for diverse training angles, simulating real-life combat scenarios.
Creating an Inspiring Ambiance
Your training environment should motivate you to push your limits. Personalize the area with motivational quotes or artwork that resonates with your fitness goals. A well-organized space is also vital. Use wall-mounted storage solutions for gloves, wraps, and other equipment to ensure that everything is within reach while keeping the area tidy. A clutter-free workout area promotes focus and helps to cultivate a disciplined mindset when approaching your training.
In conclusion, a thoughtfully organized and well-designed workout space with a punching bag not only enhances your training experience but also contributes to your overall well-being. By prioritizing safety and efficiency, while also showcasing your personal style, you can create an environment that inspires you to train harder and achieve your self-defense and fitness goals more effectively.
Best Practices for Safety in Home Boxing Training
Integrating a punching bag into your home training regimen can be an exhilarating experience, unlocking both physical conditioning and stress relief. However, safety must take precedence to ensure your workouts are effective and injury-free. Establishing a secure setup is critical, as improper installation or use can lead to accidents. Here are essential practices to prioritize safety in home boxing training, especially when hanging your punching bag.
Choose the Right Location
Selecting the appropriate spot for your punching bag is fundamental. Look for a sturdy overhead beam or wall mount that can withstand the bag’s weight and movement. Avoid locations near windows, valuable items, or where foot traffic is high. Ensuring a clear area with at least six feet of space around the bag prevents accidental collisions and allows for full range of motion during training.
Use Quality Hardware
Investing in high-quality hanging hardware is non-negotiable. Standard household tools might not be sufficient. Opt for heavy-duty wall brackets or ceiling mounts specifically designed for the weight of your bag. Check all attachments regularly for signs of wear and replace any components that show stress or damage. A reliable setup minimizes the risk of your punching bag detaching during use, which could lead to serious injury.
Warm-Up and Cool Down
Before you start your session, take time to warm up your muscles. A well-prepared body is less likely to incur injuries. Incorporate dynamic stretches or light shadow boxing before hitting the bag. Post-workout, cooling down is equally essential. Stretching fatigued muscles can aid recovery and maintain flexibility, further protecting you against strains or sprains.
To maintain a safe training environment, always listen to your body. If you feel fatigued or notice any pain that doesn’t ease with rest, consider adjusting your workout intensity or duration. Training smart not only enhances your performance but ensures that you can keep enjoying the benefits of boxing without unnecessary setbacks. Remember, effective and responsible training hinges on a strong foundation of safety practices.
Frequently asked questions
Q: What height should I hang my punching bag for optimal use?
A: Hang your punching bag at about chest height to ensure an effective workout. This position allows you to throw punches at an appropriate angle, facilitating training for both head and body shots. Adjust based on your height for better comfort and effectiveness.
Q: What tools do I need to safely install a punching bag?
A: To safely install a punching bag, you need a drill, stud finder, level, wrenches, and appropriate mounting hardware. Ensure you check the weight capacity of the hardware against the bag’s weight. For detailed mounting safety tips, refer to the “Essential Tools for Hanging Your Punching Bag” section in the main article.
Q: How can I ensure my punching bag is stable after installation?
A: To ensure stability, use a heavy-duty ceiling mount and appropriately rated hooks. Check that the bag is securely attached and hangs straight by using a level. Regularly inspect the setup for wear to maintain stability.
Q: What type of wall should I use to hang a punching bag?
A: Studded walls are best for hanging punching bags as they provide the necessary support. Avoid hollow walls unless you use heavy-duty toggle bolts. Refer to the “Step-by-Step Guide to Secure Installation” for instructions on finding wall studs.
Q: Can I hang a punching bag from a beam?
A: Yes, you can hang a punching bag from a solid beam. Ensure that the beam can support the weight of your bag and use appropriate mounting tools. If you’re unsure, consult the “Safety Considerations When Hanging a Punching Bag” section for precautionary advice.
Q: What are the signs that my punching bag installation is unsafe?
A: Indicators of an unsafe installation include visible sagging, excessive movement, or noises during use. Regular checks are crucial; if you notice any of these signs, reassess your installation to prevent accidents.
Q: Is it safe to use a punching bag outdoors?
A: Yes, but ensure it’s secured to withstand weather conditions and potential wind. Choose a sheltered location and use weather-resistant hardware. Check for guidelines in the “Alternatives to Traditional Hanging Methods” section if you plan to install it outside.
Q: What are best practices for maintaining my punching bag setup?
A: Regularly inspect the mounting hardware and bag condition. Tighten any loose screws, check for wear on the bag, and clean it to prolong its life. For detailed maintenance strategies, see the “How to Maintain Your Punching Bag Setup” part of the main article.
The Conclusion
Now that you’re equipped with the know-how to hang your punching bag securely, it’s time to take action! Remember, a strong installation not only enhances your training experience but also ensures your safety as you unleash your potential. If you’re looking for additional guidance on gear selection or advanced hanging techniques, check out our articles on selecting the right punching bag for your workout and how to maintain your punching bag.
Don’t let uncertainty hold you back-now is the time to create your perfect training space and elevate your skills. If you have any questions or need further assistance, feel free to leave a comment below. And while you’re here, consider signing up for our newsletter for exclusive tips and updates! Together, let’s keep you focused, motivated, and ready to tackle every punch.