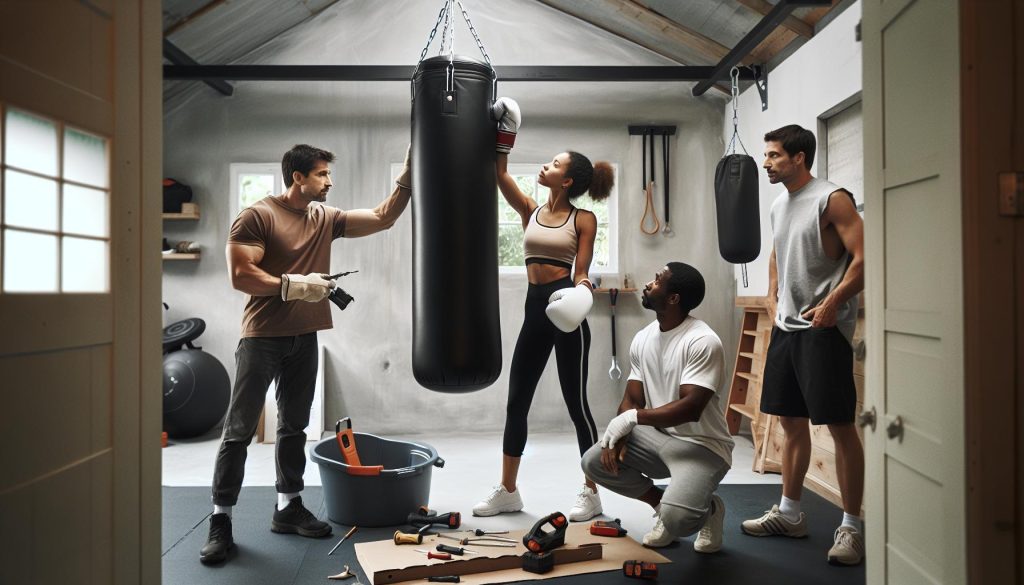
Setting up a punching bag at home can transform your workout routine, providing effective training for strength, speed, and coordination. However, safely mounting a punching bag to your ceiling is crucial to prevent accidents and ensure a secure training environment. Many enthusiasts face challenges when determining the best method for installation, with concerns about ceiling stability and weight distribution. With the right guidance, you can learn to securely elevate your fitness regimen while enjoying the benefits of this powerful training tool. We’ll explore step-by-step techniques for a safe and practical ceiling mount, ensuring you maximize your training while prioritizing safety and efficiency. Dive in to discover how to turn your home into a martial arts haven!
Choosing the Right Location for Your Punching Bag
is crucial for both safety and functionality. An ineffective placement can hinder your training and pose risks to your environment. Start by identifying a space with adequate height and clearance. Ideally, the bag should be hung where there is a minimum of 2 to 3 feet of space around it to allow for unrestricted movement while striking. Make sure to consider factors like the ceiling height; you want to avoid punching too close to the ground or hitting the ceiling during your workout.
Consider the structural integrity of the ceiling as well; it must be able to bear the weight of the heavy bag and endure the stress of your punches. Use a stud finder to locate support beams, as hanging the bag from studs ensures stability. If you’re mounting the bag in a garage or basement, think about environmental factors too. Ensure the area is well-ventilated and, if possible, not too hot or humid to avoid damage to the bag and maintain your comfort during workouts.
Lastly, think about your neighbors. If you’re in a shared building, choose a location that minimizes noise transmission. Hanging the bag in a room with carpeting or using a heavier bag can help absorb some sound. Always test your setup for stability before fully committing to the location, as shifting the bag after it’s securely mounted can be a hassle. Making a thoughtful choice will enhance your training experience and keep your space safe and enjoyable.
Essential Tools and Materials for Installation
To successfully mount a punching bag from the ceiling, you need to gather essential tools and materials beforehand. Having the right items on hand not only simplifies the installation process but also enhances safety and functionality. Start with a quality ceiling mount designed specifically for heavy bags. These mounts typically come in various forms, but a heavy-duty steel construction is recommended for durability and stability.
You’ll need basic tools such as a drill, a stud finder, and a wrench. The stud finder is crucial for locating support beams in your ceiling, ensuring that you can securely attach the bag where it will have adequate support. Safety goggles and a level can also help prevent accidents during installation and ensure the mount is straight, which is vital for the bag’s functionality.
In addition, hardware such as lag screws, hooks, and possibly a heavy bag chain or spring should be included in your materials list. Lag screws provide the necessary strength to hold the mount in place, while a heavy bag spring can reduce the impact on the mount and the ceiling, prolonging the life of your setup. You may also want to consider padding materials like rubber mats or carpet remnants to help absorb sound and minimize vibrations, particularly if your training area is in a shared space.
Lastly, ensure you have adequate safety precautions like gloves and a helmet if you’re working on a ladder or handling heavy equipment. Proper planning and preparation with these tools and materials will set the stage for a safe and effective punching bag installation.
Step-by-Step Guide to Securing the Ceiling Mount
To securely install a punching bag from the ceiling, following a systematic approach is crucial for both safety and effectiveness. Begin by using a stud finder to locate the ceiling joists; these are the sturdy beams required for a safe installation. Mark the desired position for your punching bag, ideally in an area that allows plenty of space for movement while training.
Once you’ve determined the mounting location, gather your tools and materials: a drill, lag screws, and a ceiling mount specificallydesigned for heavy bags are essential. Ensure your ceiling mount is rated for the weight of your punching bag. Position the mount on the marked spot, ensuring it is level, and drill pilot holes into the joists. This initial step helps prevent splitting the wood when you drive in the lag screws.
With the pilot holes ready, attach the ceiling mount using the lag screws. Tighten them securely, but be careful not to overtighten, as this could damage the joists. For added security, consider using washers with your screws to distribute the force evenly. After the mount is installed, hang your punching bag by attaching it to the mount using a heavy-duty chain or spring. This step not only ensures the bag is securely fastened but also helps to absorb some of the shock from your punches, prolonging the lifespan of both the bag and the mount.
Finally, test your installation. Give the bag a few light swings and punches to ensure it feels secure. If it sways too much or seems unstable, reassess your installation, possibly by checking the mount’s attachment points. Following these detailed steps will not only enhance your training experience but also keep you safe during workouts.
Understanding Weight Limits for Safety
To ensure the safety of your punching bag setup, it’s critical to understand the weight limits of both your mounting hardware and the physical structure of your ceiling. When engaging in boxing or intense training, the forces exerted on your punching bag can be substantial. A heavier bag not only adds to the weight that your ceiling must support but also impacts the mount and attachment system used.
Selecting a ceiling mount rated for significantly more than the weight of your punching bag is essential. This additional safety margin accounts for the forces generated during vigorous training sessions, ensuring the mount remains secure and functional over time. Before installation, check specific weight ratings of all components involved, including the ceiling joists, lag screws, and any chains or springs being used.
It’s also advisable to consider the total weight of the punching bag plus any additional attachments. For instance, if your heavy bag weighs 100 pounds, and you are using a heavy-duty chain system or spring that adds another 5 to 10 pounds, you need to account for that extra weight when determining if your ceiling can safely hold the entire setup. Always err on the side of caution: overestimating the weight limit can prevent dangerous accidents that may not only injure you but also cause damage to your property.
Remember, a well-installed punching bag should support and withstand your training regimen without withstanding undue strain. Regular checks of the mount and bag can help you catch any potential issues early, ensuring a safe and effective workout environment. This comprehensive understanding of weight limits contributes significantly to a secure punching bag setup, allowing you to train with confidence and reduce the risk of equipment failure.
Safety Protocols for a Secure Setup
To create a safe and effective setup for your punching bag, adhering to specific safety protocols is paramount. A well-secured punching bag not only enhances your workout experience but also prevents potentially dangerous accidents that could arise from improper installation. First and foremost, ensure that the chosen location for your mount is a sturdy, load-bearing section of the ceiling or wall. Avoid fragile areas such as plasterboard, which won’t withstand the stress of heavy punches and kicks.
When securing your punching bag, utilize high-quality, appropriately rated hardware. This includes using lag bolts designed for both the weight of the punching bag and the anticipated stress from use. Consider employing a shock-absorbing system, like bungee cords, which can reduce the strain on your mounting point by absorbing some of the impacts produced during training. This not only enhances your safety but also prolongs the lifespan of the mounting hardware.
Regular maintenance checks are crucial for long-term safety. Inspect the mount, bag, and accessories periodically for any signs of wear, such as frayed chains or loose screws. It’s wise to keep a close eye on the bag’s integrity as well – if it shows signs of significant wear or damage, consider replacing it to avoid any surprise failures. Additionally, keep your training area clear of clutter and obstacles that could lead to accidents or distractions during workouts.
Finally, always educate yourself on safe training practices. Understand your own limits and the movement patterns you will be executing with the punching bag. If you’re attempting new techniques, consider starting at a lower intensity or using a lighter bag until you’re comfortable with the setup. This proactive approach not only fosters a safer environment but also enhances your confidence and focus while training.
Common Mistakes to Avoid When Mounting
Improper mounting of a punching bag can lead to safety risks, structural damage, and frustrating workout interruptions. To ensure a secure setup, it’s crucial to avoid several common pitfalls that could compromise your installation.
One frequent mistake is neglecting to choose the right mounting location. Always ensure the area is sturdy and capable of bearing weight. Walls or ceilings with no support beams are particularly unsuitable, as they may give way under the bag’s weight, potentially causing injury or damage. Additionally, confirm that the mounting point is at least 24 inches away from walls to allow for adequate movement and prevent the bag from hitting surfaces during use [[1]].
Another oversight is using subpar or mismatched hardware. Ensure that the hardware you select can handle the weight of the punching bag, and verify that it’s compatible with the mounting surface. For example, lag bolts are essential for securing the mount in place, while chains or bungee cords need to be strong enough to absorb impacts without snapping [[3]].
Furthermore, many individuals overlook the importance of periodic maintenance checks. A failure to inspect the mounting system can result in overlooked wear and tear, such as frayed cables or loose screws. Conducting regular checks allows for timely replacements, ensuring both your safety and the longevity of the equipment [[2]].
By taking these potential mistakes into account and prioritizing a thoughtful, informed installation process, you can create a safer, more effective training environment for your workouts.
Maintaining Your Punching Bag Setup Over Time
Maintaining your punching bag setup is crucial not only for the longevity of the equipment but also for ensuring a safe and effective training experience. Regular maintenance can prevent unforeseen accidents and keep your workouts productive. To safeguard your investment and enhance your training environment, consider the following practical tips.
Firstly, regularly inspect your mounting hardware to ensure everything remains securely fastened. Look for signs of wear, especially on chains, hooks, and screws. If you notice any fraying or fatigue in the materials, replace them immediately to prevent potential failures during use. Additionally, performing these checks after every few sessions can help catch issues early, ensuring that your setup remains robust and safe.
Next, cleaning your punching bag and surrounding area is essential. Sweat and debris can accumulate, which not only leads to unpleasant odors but can also decrease the lifespan of your bag. Use a damp cloth to wipe down the bag after each training session, and consider using a suitable cleaning solution designed for your bag’s material. This step not only keeps your equipment fresh but also encourages a hygienic training environment.
Lastly, monitor the condition of your training surface. If your bag is hanging from a ceiling mount, ensure that the structure above can consistently support the bag’s weight and absorb vibrations. Over time, vibrations can cause wear on both the ceiling and the bag itself. If your bag is hitting the floor or nearby walls during use, adjusting the bag height or the mounting position may be necessary to ensure optimal use without risking damage.
By establishing a routine for inspection, cleaning, and adjustments, you can ensure that your punching bag setup remains safe and effective, allowing you to focus on improving your technique and fitness.
Adjusting Bag Height for Optimal Workout
Finding the right height for your punching bag is crucial for maximizing your training effectiveness. If the bag is too low, it can lead to poor technique and may even cause injury; if it’s too high, you won’t be able to engage properly with your workouts. Ideally, the bottom of the bag should be at about eye level when standing. This positioning allows for a versatile range of punches, including jabs, crosses, and uppercuts, while also accommodating various footwork drills.
When adjusting the height, consider the types of workouts you plan on doing. For instance, if you intend to practice a lot of low kicks or knee strikes, a slightly lower bag may be beneficial. Alternatively, for heavy upper-body techniques, positioning the bag higher can enhance the range of motion in your strikes. Make incremental adjustments to ensure that you don’t go from one extreme to another, and always test the height by throwing a few punches to see how it feels during a workout.
To facilitate easy adjustments, use a reliable mounting system that allows you to quickly change the height of the bag. Consider incorporating quick-release pins or adjustable chains to your setup. This way, you can tailor the height based on different workout needs or even switch quickly between different styles of training. Keeping a toolkit nearby for frequent adjustments can further streamline your experience.
Remember to continuously evaluate the bag position as your training evolves. As you become more advanced, your needs might change. Regularly reviewing the bag’s height and making adjustments is a simple yet effective way to ensure that your workouts remain challenging and beneficial.
Alternative Mounting Solutions for Different Ceilings
Finding the right mounting solution for your punching bag can be challenging, especially when considering different ceiling types. Not all ceilings are created equal; some may be made of concrete, while others are drywall or metal. Understanding these differences will help ensure a safe and efficient setup for your home gym.
For concrete ceilings, a direct installation method using heavy-duty concrete anchors is ideal. This approach provides the necessary support to handle the weight of the punching bag. Ensure you drill into the concrete at the correct angle and depth to secure the anchors properly. Utilizing a mounting plate can also distribute the bag’s weight more evenly and prevent damage to the ceiling.
In contrast, if you’re dealing with drywall ceilings, it’s crucial to locate a beam or joist to support the load. Punching bags can be heavy, and relying solely on drywall can lead to catastrophic failure. Using a wall-mounted bar or bracket that attaches securely to the joists is a recommended alternative. This solution not only adds stability but also allows for more versatile bag placement.
For suspended ceilings, consider using a purpose-built punching bag mount designed for this type of structure. These mounts typically include additional braces or supports that distribute the force throughout the ceiling tiles, reducing the risk of collapse. Alternatively, you may opt for a freestanding punching bag, which doesn’t require any ceiling installation at all. This is a great option for those who may have rental properties or ceilings that cannot support a mounted bag.
Lastly, ensure the mounting solution you choose accounts for the weight and dynamics of your training. Proper installation not only maximizes your training effectiveness but also enhances safety, allowing you to focus on your workout without fear of equipment failure. By understanding the structural differences in your ceilings, you can make informed choices that will serve you well in your training endeavors.
Tips for Enhancing Your Home Gym Environment
Creating an effective home gym environment can significantly enhance your workout experience, particularly when incorporating elements like a punching bag setup. One of the first considerations is the room’s overall layout. Ensure that your workout area is spacious enough to allow for movement without obstruction. A minimalistic approach helps reduce distractions; consider using storage solutions like wall-mounted shelves or bins to keep the space organized.
Lighting and Air Quality
Proper lighting can elevate the motivation to train. Natural light is ideal, but if that’s not an option, consider installing bright, artificial lights that mimic daylight. Additionally, good air circulation is crucial for comfort during intense workouts. Use fans or open windows to maintain a cool environment, and consider an air purifier to reduce allergens and improve air quality, which can enhance your stamina and focus.
Flooring Considerations
The floor surface is another critical aspect. If you’re setting up a punching bag, invest in high-impact flooring or rubber mats that can absorb shock and reduce noise, protecting both your equipment and the floor beneath. This is particularly important for apartment dwellers who may want to minimize sound transmission to neighbors.
Creating Zones
To maximize the functionality of your home gym, create dedicated zones for different workout types. For instance, designate a specific area for the punching bag, another for bodyweight exercises, and perhaps a corner for stretching or yoga. This structured layout encourages a focused approach to your workouts and helps maintain a sense of order.
Incorporate Motivational Elements
Lastly, don’t underestimate the power of motivation. Display artwork or quotes that inspire you, utilize a sound system for music that energizes your sessions, and keep a whiteboard for tracking workout progress or setting goals. Personalizing the space with items that resonate with your fitness journey can make your home gym a place where you genuinely look forward to training.
How to Avoid Disturbing Neighbors While Training
To keep your training sessions with a punching bag effective without disturbing your neighbors, consider soundproofing your environment and being mindful of your training schedule. Starting with soundproofing, use thick rubber mats or specialized acoustic flooring. These surfaces can significantly dampen the noise generated during workouts. Additionally, consider hanging your punching bag in an isolated area, such as a garage or a basement, where the vibrations and sounds are less likely to transmit through walls or floors.
Another effective tactic is to choose your training times wisely. If you live in a shared space or close quarters, avoid using the bag during late-night or early-morning hours when neighbors are likely to be resting. Aim for times when noise is less likely to disrupt others’ routines, such as mid-afternoon. Communicating with your neighbors can also foster goodwill; let them know your workout schedule and ask if they have any preferred quiet hours.
Integrating silent training techniques can further reduce noise. For instance, practice footwork and combinations without striking the bag aggressively to keep noise levels down. Additionally, opt for gloves that provide good hand protection while minimizing noise upon impact. These small adjustments can go a long way in maintaining good neighborly relations while still allowing you to commit to your training.
Frequently Asked Questions
Q: How do I choose the right location to mount my punching bag on the ceiling?
A: To choose the right location, ensure the ceiling is at least 8-10 feet high and free from obstructions. The area should provide enough space to swing the bag without hitting walls or furniture, allowing for a safe and effective workout.
Q: What tools do I need to mount a punching bag on the ceiling?
A: Essential tools include a stud finder, a drill, lag screws, a wrench, and a level. You’ll also require a ceiling mount kit specifically designed for punching bags to ensure a secure installation.
Q: What type of ceiling is best for mounting a punching bag?
A: The best ceilings for mounting a punching bag are wood or concrete ceilings. These provide the necessary support for heavy bags. Avoid mounting on drywall alone, as it may not withstand the bag’s weight and motion.
Q: How can I ensure that my ceiling mount is safe and secure?
A: To ensure safety, always find a wooden stud to install the mount. Use heavy-duty lag screws and check the weight capacity of the mount. Regularly inspect the installation for wear and tear or loosening over time.
Q: Can I mount a punching bag if my ceiling is low?
A: If your ceiling is low, consider using a ceiling extension kit or opting for a wall-mounted solution instead. Ensure the bag still has enough clearance to swing freely without hitting the ground.
Q: What precautions should I take to avoid damaging my ceiling when mounting a punching bag?
A: To avoid damage, always use a stud finder to locate safe mounting points and avoid using anchors in drywall alone. Reinforce your ceiling with additional support if necessary, especially for heavier bags.
Q: How do I adjust the height of my punching bag after it’s mounted?
A: To adjust the height, use an adjustable mount or replace the hanging chain with a longer or shorter one. Ensure to recheck the stability after making any height adjustments to maintain safety during workouts.
Q: What should I do if my punching bag is swinging excessively after installation?
A: If the bag swings excessively, check for loose screws and tighten them. You may need to add additional support or adjust the mounting position for better stability to prevent unwanted movement during use.
In Summary
Now that you’re equipped with a safe and effective method for mounting your punching bag, it’s time to put this knowledge into action. Remember, a properly installed punching bag provides a fantastic workout and can enhance your self-defense training significantly. If you’re unsure about any aspects of the installation, don’t hesitate to consult our resources on choosing the right equipment or safety protocols.
As you get started, consider exploring our other guides on training techniques and self-defense strategies to bolster your skills further. Join our newsletter for regular updates and tips that can elevate your training routine while ensuring safety at all times. Your journey towards building strength and confidence in self-defense begins here-let’s take the next step together!
For more insights on effective training setups or to share your experience, leave a comment below. Your feedback not only helps us improve but builds a community of enthusiasts dedicated to learning together!