In the world of baking, mastering the technique of punching down dough is crucial for achieving perfectly risen bread. This essential step not only redistributes yeast, but also creates a uniform texture by removing excess air bubbles. Have you ever faced a dense loaf that didn’t rise as expected? Learning how to properly punch down dough can prevent that frustration. As you work through this technique, you’ll discover how it influences the final product, allowing your creations to achieve a delightful, airy quality. So, let’s explore the art of punching down dough, ensuring your next baking endeavor is a success!
Understanding the Importance of Punching Down Dough
Punching down dough is a crucial step in the bread-making process that many bakers may overlook, yet it holds significant importance for achieving the desired texture and flavor in your final product. When dough rises, it traps gas produced by yeast throughout the fermentation process. Punching down dough releases this accumulated gas, allowing for a more even distribution of carbon dioxide and enabling yeast to generate more flavor. This step also helps to strengthen the gluten structure, giving your bread a better rise during the final baking.
Furthermore, properly punching down dough can help to control fermentation. Overproofed dough can lead to an undesirable flavor and tall, airy bread that lacks the necessary structure. By deflating the dough, you ensure that it maintains its elasticity and strength, leading to a product that bakes uniformly and has an appealing crust and crumb. Think of this process as giving your dough a second chance; it redistributes the ingredients and activates the yeast again, enhancing the overall quality of your bread.
When approaching the act of punching down, remember to use a gentle touch-this is not a vigorous beating but rather a controlled release of gases. Using the heels of your hands, press down softly in the center and then work your way out to the edges. This technique helps avoid tearing the dough and maintains the integrity of the gluten network. Understanding and applying this essential technique will empower you as a baker, ensuring each loaf you create is flavorful and textured to perfection.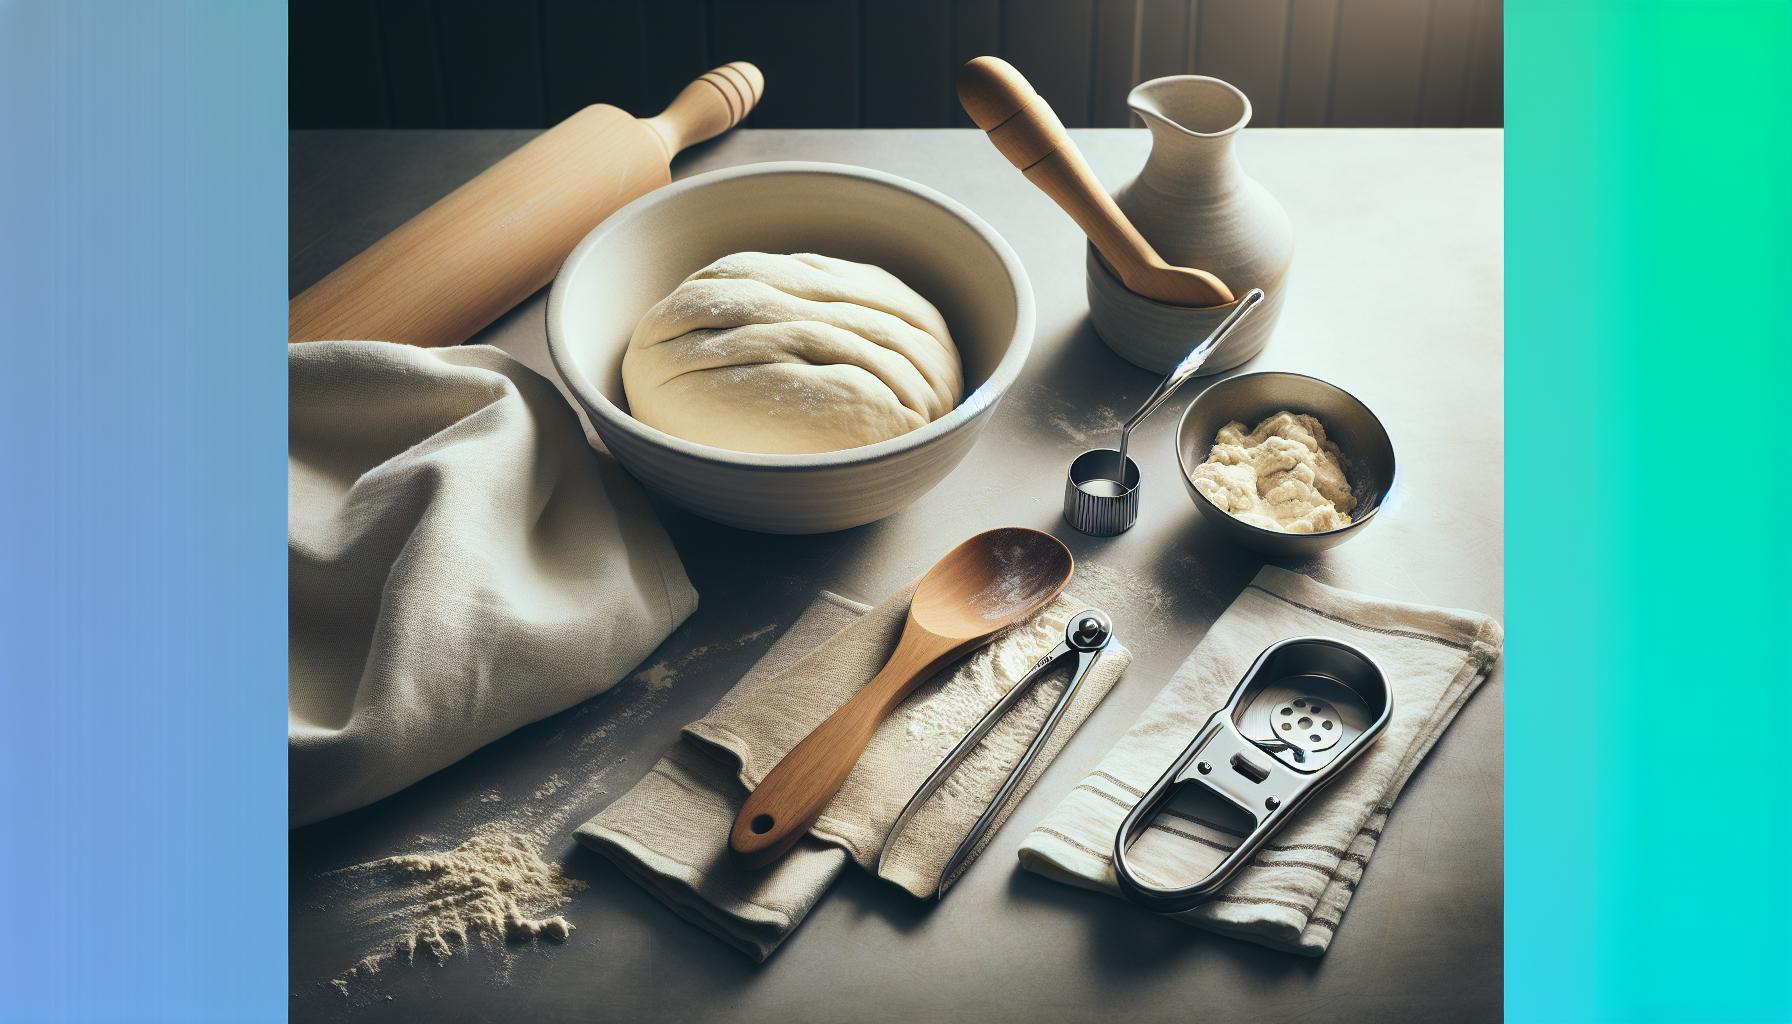
Essential Tools for Punching Down Dough
When it comes to successfully punching down dough, having the right tools can make all the difference in achieving that perfect texture and rise. While the technique itself is essential, the equipment you use not only aids in your hand’s approach to the dough but also enhances your overall baking experience.
One of the most crucial tools is your hands-these are your primary instruments for punching down the dough. Clean, dry hands allow you to feel the dough’s texture and elasticity, which is critical for effective punching. For those who prefer a little extra leverage, a sturdy bench scraper can be particularly useful. It helps to lift and deflate the dough with precision, allowing you to redistribute the gases without tearing the gluten structure.
In addition to your hands and bench scraper, a large mixing bowl or a clean work surface is essential. A bowl allows you to keep everything contained, while a smooth, clean surface makes the punching process easier. Non-stick surfaces (like silicone mats) can prevent the dough from sticking, making the punching down process smoother. Lastly, flour for dusting your hands or the work surface is a simple tool that can prevent the dough from sticking too much, giving you better control when handling your dough.
Using these tools not only enhances the technique of punching down but also encourages a more enjoyable and efficient baking process. The right setup can elevate your ability to create beautiful, tasty loaves while instilling confidence in your baking skills. With the proper instruments at your disposal, you’re well on your way to mastering the art of dough handling.
Step-by-Step Guide to Punching Down Dough
To effectively punch down dough, you must approach the process with a mix of technique and intuition. This method not only helps to redistribute gases within the dough but also ensures that the gluten structure remains intact for better texture. Here’s a streamlined way to accomplish this crucial task.
Start by checking the dough. It should have risen, becoming puffy and airy. Gently press down with your fingers to release some of the gas; this allows the dough to “deflate” just enough to be manageable. Next, using your fists or palms, push down into the center of the dough firmly yet gently. You’re aiming to flatten it without tearing-maintain a connection with it, feeling its elastic resistance.
After the initial punch down, fold the edges of the dough toward the center. This helps unify the dough again and fosters more development of gluten as you prepare for the final proof. Use your bench scraper, if necessary, to lift and manipulate the dough without excessive stickiness. Finally, let your dough rest again, covered, for another rise. This short break allows the yeast to activate fully in the freshly reincorporated air, setting you up for success in your baking journey.
Overall, prioritize gentleness alongside firmness. The goal is to manage the dough effectively without overworking it, ensuring a perfect final outcome. As you practice this technique, you’ll notice your intuition improving, making the punching down process a seamless part of your baking routine.
Common Mistakes When Punching Down Dough
When it comes to punching down dough, avoiding common pitfalls can significantly improve your baking results. One prevalent mistake is being too aggressive during the deflating process. Many bakers rush in, using excessive force when punching down. This approach can lead to tearing the gluten structure instead of gently redistributing the gases. A firmer hand isn’t always better; it’s essential to maintain a balance between decisiveness and care. Instead, aim for a method where you gently but firmly push down in the center and then fold the edges toward the middle.
Another frequent error is neglecting to assess the dough’s doneness before punching it down. If the dough has not risen sufficiently-still appearing dense and flat-attempting to deflate it may not yield the intended results. Always give the dough the necessary time to rise based on the recipe’s requirements. Overlooking this aspect can hinder the development of flavors and textures you strive for in your final product.
Additionally, failing to keep your hands and the surface lightly floured can lead to stickiness, making the process cumbersome and messy. A bit of flour can prevent the dough from clinging to your hands, allowing for a smoother handling experience. On the flip side, using too much flour can dry out the dough, affecting its hydration level and ultimately leading to a compromised texture.
Lastly, many bakers skip the resting phase post-punching down, thinking it unnecessary. However, allowing the dough to rest for a short period after punching helps re-activate the yeast and improve the final rise during the next phase. This crucial step should not be omitted, as it enhances the fermentation process and contributes to the overall quality of your baked goods.
By being mindful of these common mistakes and adjusting your technique accordingly, you’ll enhance your baking proficiency and achieve dough that rises beautifully and has an incredible texture.
Different Types of Dough: How to Adjust Techniques
When it comes to working with dough, understanding the different types and their unique characteristics can greatly influence how you approach punching down techniques. Not all dough is created equal, and variations in hydration levels, gluten development, and fat content necessitate adjustments in your method. For instance, a high-hydration dough, such as ciabatta, will require a gentler touch. If you punch down too aggressively, you risk tearing the delicate gluten structure, which could lead to a dense, unappealing loaf.
On the other hand, enriched doughs, like brioche, contain more fat and sugar, affecting their rise and elasticity. For these doughs, a slightly firmer punch is acceptable, as the fats help to keep the dough pliable and easier to reshape after deflating. When dealing with enriched dough, it’s essential to ensure that you allow it to rest adequately after punching down. This resting period helps the gluten relax, making the dough easier to shape and improving texture in the final bake.
Doughs made primarily for pizza or flatbreads might benefit from a more vigorous deflation process. These types of dough require a robust texture that can hold toppings and toppings during baking. In this case, you can use a more deliberate punching motion, followed by folding and stretching the edges into the center. This technique will not only redistribute the gases but also develop the necessary strength in the dough for a satisfying crunch.
Lastly, it’s crucial to pay attention to the visual and tactile cues of the dough you’re working with. Understanding when a dough is ready to be punched down or when it requires a gentler approach will help you create beautifully risen and textured baked goods. By tailoring your punching techniques to suit the specific type of dough, you can enhance the overall quality of your final product while ensuring a successful baking experience.
In summary, adapt your punching technique based on the dough type:
- For high-hydration doughs, use a gentle approach.
- For enriched doughs, a firmer touch is acceptable, followed by resting.
- For robust doughs like pizza or flatbreads, a more vigorous method is appropriate.
By mastering these adjustments, you’ll improve your baking skills and outcomes significantly.
The Science Behind Punching Down Dough
When it comes to baking, is rooted in understanding fermentation and gluten development. During the initial rise, yeast ferments sugars in the flour, producing carbon dioxide gas that causes the dough to expand. However, as the dough rises, the gas pockets become larger and can lead to overly airy or uneven textures in the final bake. Punching down the dough serves as a controlled means to deflate these gas bubbles, redistributing the yeast and creating a more uniform crumb structure.
This act of deflation also triggers further gluten development, which is crucial for the dough’s elasticity and structure. Gluten, the protein responsible for the dough’s strength, stretches and positions itself more effectively when the dough is punched. This is why it’s vital to use the right technique: a gentle punch for high-hydration doughs allows for the right amount of gas release without tearing the gluten strands, while a firmer punch can be employed for more robust doughs.
Moreover, punching down dough facilitates additional fermentation. By redistributing the yeast, you’re not only preventing over-expansion but also encouraging the yeast to continue its activity in a more controlled manner during the subsequent rise. This results in dough that is not just resilient but flavorful, as yeast contributes to the taste profile of the final product.
In applying this technique, it is essential to engage your senses. Observe the dough’s texture and elasticity to determine the correct approach. Effective punching means using your hands to combine both the force needed to deflate and the gentleness required to maintain the structure, paving the way for a beautifully risen loaf after the second proofing. Understanding this blend of science and technique will significantly elevate your baking skills.
How to Know When Dough is Ready to be Punched
To achieve that perfect loaf of bread, knowing precisely when your dough is ready to be punched down is key. Typically, this signals the end of the first rise, when the dough has expanded and is showing signs of fermentation. An effective method to gauge readiness involves observing the dough’s size and texture. The dough should ideally double in volume, visibly puffed and airy but not excessively so. If the dough appears overly inflated, it may lead to larger, uneven gas pockets in the final product, making it crucial to manage its volume.
Another telltale sign that dough is primed for punching is its surface. It should exhibit a smooth, slightly tacky feel without being overly sticky. When gently pressed with your finger, the dough should spring back but leave a slight indentation. This indicates that while enough air has been incorporated, there’s still a desirable level of elasticity and tension in the gluten structure.
Timing is also of the essence. Most doughs will typically require one to two hours to rise, depending on the recipe and ambient temperature. Professional bakers often use a combination of time and visual cues, making note of the dough’s unique behavior. Additionally, the scent is a helpful indicator: a pleasantly yeasty aroma suggests active fermentation, signaling that it’s the right moment for the gentle yet firm punch that will set the stage for the next rise.
In summary, look for visual volume increases, tactile feedback, and olfactory cues to determine when your dough is ready for the punching process. These indicators will help ensure you maintain the ideal fermentation balance, resulting in a dough that rises beautifully during the second proofing and yields a perfect texture after baking.
Punching Down vs. Kneading: Key Differences
To create the perfect loaf of bread, understanding the nuances of dough handling is essential, especially when distinguishing between punching down and kneading. Both techniques serve distinct purposes in the bread-making process, and recognizing their differences can enhance your baking skills.
Punching down dough typically occurs after the first rise. The primary goal is to release excess gas produced during fermentation and redistribute the yeast. This gentle flattening technique allows for an even texture in the final product by preventing large air pockets. It’s a quick and straightforward process; you want to be firm yet gentle, pressing the dough down with your fists or palms to expel air without overworking it.
In contrast, kneading is a more vigorous and extended process designed to develop gluten structure, which provides elasticity and strength to the dough. This is crucial for dough types like bread that require a good rise. Kneading involves folding, pushing, and stretching the dough repeatedly, often for around 8-10 minutes, until it becomes smooth and elastic. While kneading can coincide with the dough-making process, punching down occurs primarily during fermentation.
For bakers, understanding when to punch down and when to knead is key to achieving desired results. Too much punching can lead to dense bread, while insufficient kneading may result in a crumbly texture. Each technique sets the foundation for the other, ensuring that your bread rises beautifully and has the right chew.
By mastering these techniques, you not only improve the texture and flavor of your bread but also elevate your overall baking proficiency. Experiment with both methods to see how they affect your dough, and you’ll quickly appreciate their unique contributions to the art of bread-making.
Advanced Techniques for Perfect Dough Punching
To achieve the perfect loaf of bread, mastering the technique of punching down dough is essential, and there are advanced techniques that can elevate this skill even further. One common method involves using a gentle yet firm technique to expel gas while redistributing the dough’s yeast evenly. This approach is vital for ensuring consistent texture and flavor in your final product.
Start by dusting your hands with a little flour before you begin. This simple technique not only prevents the dough from sticking but also makes the entire process smoother. When you punch down the dough, focus on applying even pressure with your palms or fists, allowing the dough to spread out naturally. Instead of outright “punching,” think of it as a gentle flattening motion – this prevents overworking the gluten while still expelling excess gas.
Incorporating timing and observation into your method can significantly impact the success of your punching technique. The ideal moment to punch down your dough is when it has more than doubled in size and feels light and airy to touch. After punching down, allow the dough to rest for a few minutes before shaping, ensuring that it relaxes and is easier to work with. This resting period helps reduce tension in the dough, making it more manageable for subsequent rises or shaping.
Lastly, consider the type of flour you’re using, as different flours contain varying protein levels, which can affect hydration and elasticity. Higher protein flours may require a more deliberate approach to ensure that gluten isn’t overworked while still allowing the dough to rise correctly post-punching. Adjust your technique accordingly by lightly kneading the dough after punching it down if it feels too dense. This balance of technique and ingredient awareness will bring you one step closer to baking perfection.
FAQs About Punching Down Dough Techniques
To ensure your dough achieves the best possible structure and rise, understanding the process of punching down is essential. Here are some frequently asked questions that clarify this technique:
When should I punch down my dough?
It’s crucial to punch down the dough after it has more than doubled in size during its first rise. The dough should feel light and airy, indicating that it has developed sufficient gas bubbles. Waiting too long can lead to over-proofing, which may negatively affect the dough’s structure and texture.
What should I use to punch down the dough?
Your hands can serve as the best tools for this task. Always dust your fingers with a bit of flour to prevent sticking. Use a gentle approach-pressing down evenly with your palms rather than punching aggressively will help maintain the gluten structure while expelling excess gas.
Can I punch down enriched dough differently?
Yes! Enriched doughs, which contain fats and sugars, often require a more delicate touch due to their rich composition. When punching down this type of dough, apply less force and allow for a more gradual redistributing of gases. This can help maintain the soft and tender texture that enriched breads are known for.
What happens if I forget to punch down my dough?
If you skip this important step, the dough might continue to rise unchecked, leading to weak gluten structure and a bread that doesn’t hold its shape well. In extreme cases, the formed dough can collapse under its weight, resulting in dense or poorly risen bread. Always remember to check your dough periodically!
Are there special techniques for different types of dough?
Indeed, specific doughs like ciabatta or focaccia, which are wetter and more extensible, may require gentler handling when punching down. Pay close attention to the dough’s texture; you may need to adjust the amount of pressure you use for various dough types to maintain the desired consistency.
By addressing these questions, bakers can better navigate the intricacies of punching down dough, ensuring each loaf rises beautifully and boasts a delightful texture.
Tips for Perfecting Dough Texture and Rise
To achieve the perfect dough texture and rise, a few strategic tips can make all the difference in your baking success. One fundamental principle is to keep an eye on the dough’s hydration level. For a well-balanced texture, it’s essential to measure your water and flour accurately, as even slight deviations can affect how the dough rises and bakes. Keeping the hydration consistent allows for a more reliable fermentation process, which is crucial for developing the desired crumb structure in your bread.
Another technique involves proper handling during the punching down process. Rather than aggressively deflating the dough, which can disrupt gluten development, use a gentle, folding motion to redistribute the gases evenly. This technique not only helps maintain the dough’s elasticity but also improves the texture of the final product. Consider using your fingertips to prod the dough lightly, allowing it to deflate without losing its shape.
Utilizing Temperature Control
Temperature plays a vital role in fermentation. Keep your dough in a warm, draft-free environment to encourage optimal yeast activity, but be cautious of overheating. Too warm, and the yeast might work too quickly, leading to over-proofing. Conversely, cooler temperatures can slow fermentation, leading to a dense texture. Aim for room temperature to strike a balance that promotes a slow, steady rise, which enhances flavor development.
Resting Periods
Don’t overlook the importance of resting periods. Allowing your dough to rest after punching it down gives the gluten time to relax, making it easier to shape while enhancing the final texture. Implementing short rest intervals of about 15-30 minutes can yield noticeable benefits in the dough’s pliability and overall structure.
By applying these techniques thoughtfully, you’re not just following a recipe-you’re engaging with the dough on a deeper level, leading to an end product that isn’t just about how it looks, but how it tastes and feels. Remember, every baker’s journey is unique, and fine-tuning these processes to fit your personal style and the specific qualities of your ingredients will result in truly exceptional bread.
Troubleshooting Dough Problems: When Punching Down is Not Enough
When it comes to working with dough, there are times when simply punching it down is not enough to resolve issues that may arise during the fermentation process. Recognizing the signs that your dough needs more attention can greatly enhance the final product. If your dough is overly sticky, for example, it could benefit from a brief kneading session before you proceed with shaping or proofing. The extra handling helps develop gluten structure, making the dough more manageable and improving its overall texture.
Another common issue is if your dough doesn’t seem to rise adequately even after being punched down. This could indicate that the yeast is not functioning effectively, potentially due to improper temperature control or expired yeast. Make sure to check that your yeast is fresh and proof it before use to confirm its viability. Additionally, if your dough has developed a strong, unpleasant smell or is overly dense, this may signal over-fermentation. In such cases, it is wise to consider discarding the batch and starting anew, as the fermentation has likely gone beyond optimal conditions.
Furthermore, you may encounter a situation where your dough is overly dry after punching down, which can occur if it has been left in a low-humidity environment. To remedy this, consider spritzing the dough lightly with water before covering it to create a more humid baking environment. This small adjustment helps in maintaining moisture levels and allows for better rises in subsequent proofing stages.
In situations where the dough has failed to come together smoothly post-punching, revisiting your ingredients and their measurements could also be helpful. For future batches, ensuring precise measurements can prevent variations that affect dough performance. Keep in mind that adjusting your techniques based on the specific characteristics of the dough type is crucial-what works for a bread dough may not be appropriate for a pastry dough. Embracing these troubleshooting techniques can lead to a more consistent baking experience, ultimately enhancing your bread-making skills.
Faq
Q: What is the purpose of punching down dough?
A: The purpose of punching down dough is to release excess gas produced by the yeast during fermentation. This process helps redistribute the yeast and sugars, promoting a more uniform texture and better rise in your final baked product.
Q: How do you know when to punch down dough?
A: You should punch down dough when it has doubled in size and has visible bubbles on the surface. At this stage, the dough has finished its first fermentation phase and is ready to be deflated for even texture and flavor enhancement.
Q: Can you punch down dough too much?
A: Yes, over-punching dough can lead to a dense texture and reduce overall flavor development. It’s essential to punch it down gently and only when necessary, as this allows the yeast to remain active for a lighter end product.
Q: Should you flour your hands when punching down dough?
A: It’s not necessary to flour your hands when punching down dough, but doing so can help prevent sticking. Use a light dusting if your dough is particularly tacky, and be sure to focus on compressing and folding the dough rather than kneading further.
Q: How does the type of dough affect punching down techniques?
A: Different types of dough, like bread versus pastry, require varied punching techniques. For bread dough, a thorough punch is vital for creating a strong gluten structure, while gentler techniques are preferred for more delicate doughs like brioche to maintain their airy quality.
Q: What happens if you don’t punch down dough?
A: If you skip punching down dough, it can lead to excessive gas buildup, resulting in large holes and an uneven texture in your baked product. This practice is crucial for maintaining the right fermentation balance and ensuring a desirable crumb structure.
Q: Are there alternatives to punching down dough?
A: Yes, alternatives include folding the dough gently or giving it a light knead. These methods can effectively redistribute gases without deflating the dough too much, allowing for a more airy texture, particularly beneficial for artisanal bread recipes.
Q: Can you punch down dough after shaping it?
A: No, it’s best to punch down the dough before shaping. Once shaped, any deflation could negatively affect the dough’s structure and elasticity, leading to flat or unevenly risen baked goods. Focus on punching down during the fermentation stages.
Concluding Remarks
Congratulations on mastering the essential technique of punching down dough! This step not only enhances your bread’s texture but also helps to develop flavor and strength in your baking. Don’t let this newfound knowledge sit idle-experiment with different bread recipes and see how this technique elevates your baked goods to the next level! For deeper insights, check out our guides on baking essentials and common bread-making mistakes to further refine your skills.
Ready to bake? Dive into our collection of easy cookie and pastry recipes that are perfect for any occasion; they’ll inspire you to get creative in the kitchen! Remember, practice makes perfect, so don’t hesitate to get your hands doughy and enjoy the process. And if you found this guide useful, subscribe to our newsletter for more baking tips and exclusive recipes delivered straight to your inbox. Happy baking!